Configuring Ubuntu in Multipass for Local Web Development on a MacBook

I’ve been using an Apple MacBook since June 2021. While I don’t totally hate it, I still prefer a LAMP or LEMP stack as my default local web development environment. The best alternative I’ve found on the Mac is Laravel Valet, but it’s not without some minor niggles, mostly the fact that the web server is actually a PHP file. I’ve also found that the local site certificates don’t fully work with Firefox, and the root certificate needs to be installed manually, which is a bit of a pain when that certificate expires.
If I’m honest with myself though, I’ve been using a LAMP stack on Ubuntu for going on 20 years now, and I just prefer it. You can’t get closer to a real-world web server than developing directly on a Linux distribution, real or virtual. What I would really like is something that fully replicates a LAMP server, but on a Mac.
- I want to be able to run Ubuntu, Apache, PHP, and MySQL
- I need to be able to access my source code on my local hard drive
- I need to be able to provision a new local site as quickly as I could on my Ubuntu Workstation
- I want to use Mkcert for locally trusted SSL certificates
- I want to access the MySQL database in the browser using PHPMyadmin
- I want to use Mailhog to catch all outgoing emails
- I don’t want something reliant on Docker or VirtualBox
Fortunately, this is all possible using Multipass. Multipass is a virtualization tool built by the folks at Canonical. It’s about the simplest way I’ve encountered to launch and run virtual Ubuntu instances, with way less complexity and resource usage compared to something like Docker or VirtualBox.
I actually used Multipass during my time at Delicious Brains. Whenever I needed to set up screenshots of a test site but representing a production URL, without actually using that production URL, I’d just launch a new Multipass instance with Apache, PHP, MySQL, and a custom Apache virtual host file. Then I could configure a /etc/hosts record on the Mac for the URL in question, and point to my virtual instance.
The actual setup process is a bit more involved than just installing and configuring the web server stack on an Ubuntu machine, but I want to try and turn this into something that installs everything automatically. So for now I’m documenting all the manual processes.
MacOS Software requirements
To get this all set up, I need to install some software on the Mac. I’m not going to go through the installation steps here, as they’re all on the sites for the software required, but it’s mostly a case of either downloading the relevant installer, or copying and running a script.
I also need some additional development-related software on the Mac.
- mkcert: Installed via Homebrew, allows me to quickly create locally trusted SSL certificates.
- PHP: I’ll install this via Homebrew. Mostly I just need this to use WP-CLI.
- WP-CLI: I’ll install this via Homebrew as well. I use WP-CLI to run various WordPress-related commands from the macOS terminal. I will probably also install this on the Multipass instance, along with Composer and NodeJS, but having it on the Mac makes day to date life a little easier.
I’m going to be using some online tutorials that I refer to regularly when installing the webserver software on an Ubuntu server:
- DigitalOcean’s guide to installing LAMP on Ubuntu 20.04 LTS
- SpinupWP’s guide to installing LEMP on Ubuntu 20.04 LTS
- This guide to installing Mailhog on Ubuntu 16.04 LTS, which also works for any LTS so far, I’ve tested this up to 22.04 LTS
Instructions
Initial Mac Setup
Step 0: Download and install Multipass, Homebrew, PHP, WP-CLI, and mkcert
Step 1: Install the mkcert root certificate
In the MacBook terminal, run this command to install the root certificate, if you haven’t already.
mkcert -install
Step 2: Create the base Ubuntu Multipass instance
I’m calling the instance triangle, because like most server nerds I have a specific server naming convention. In my case, Brazilian Jiu-Jitsu techniques.
multipass launch --name triangle
Once the instance has been launched, you can run the list command to get the instance IP address.
multipass list
By default, Multipass will assign an IPv4 address range to a virtual network, where your client machine (the Mac) will be the first address on that range, and the virtual instances will be subsequent IP addresses. In my case, my MacBook is assigned 192.168.64.1 and the first instance is assigned 192.168.64.2.
What I like to do at this point is edit the /etc/hosts file on the Mac, and add a record pointing to the virtual instance.
192.168.64.2 triangle
This way I can just browse to http://triangle and it will resolve to that IP address. This is handy for testing that things like Apache and PHP have been installed correctly later on.
Instance Setup and Configuration
Step 0: Access the Multipass instance
To SSH into a multipass instance shell, you can use the Multipass shell command and the instance name.
multipass shell triangle
It’s also possible to set up your SSH key as an authorized_keys record, as you would do on a physical Ubuntu server, and use the ssh command. But that’s for another tutorial.
Now we can start to install and configure the web server software on the Multipass instance.
Step 1: Set up the required repositories
I’m using the custom Apache2 and PHP PPAs maintained by Ondřej Surý so that I can switch between PHP versions if I ever need to.
sudo add-apt-repository ppa:ondrej/apache2 -y
sudo add-apt-repository ppa:ondrej/php -y
sudo apt update
sudo apt upgrade -y
Step 2: Install Apache/PHP/MySQL
sudo apt install apache2 -y
sudo apt install php \
libapache2-mod-php php-mysql php-common \
php-xml php-xmlrpc php-curl php-gd \
php-imagick php-cli php-dev php-imap \
php-mbstring php-soap php-zip -y
sudo apt install mysql-server -y
Using the PHP PPA’s will install PHP 8.1. I also like to create a custom php.ini file, for any PHP custom settings I need.
sudo touch /etc/php/8.1/apache2/conf.d/user.ini
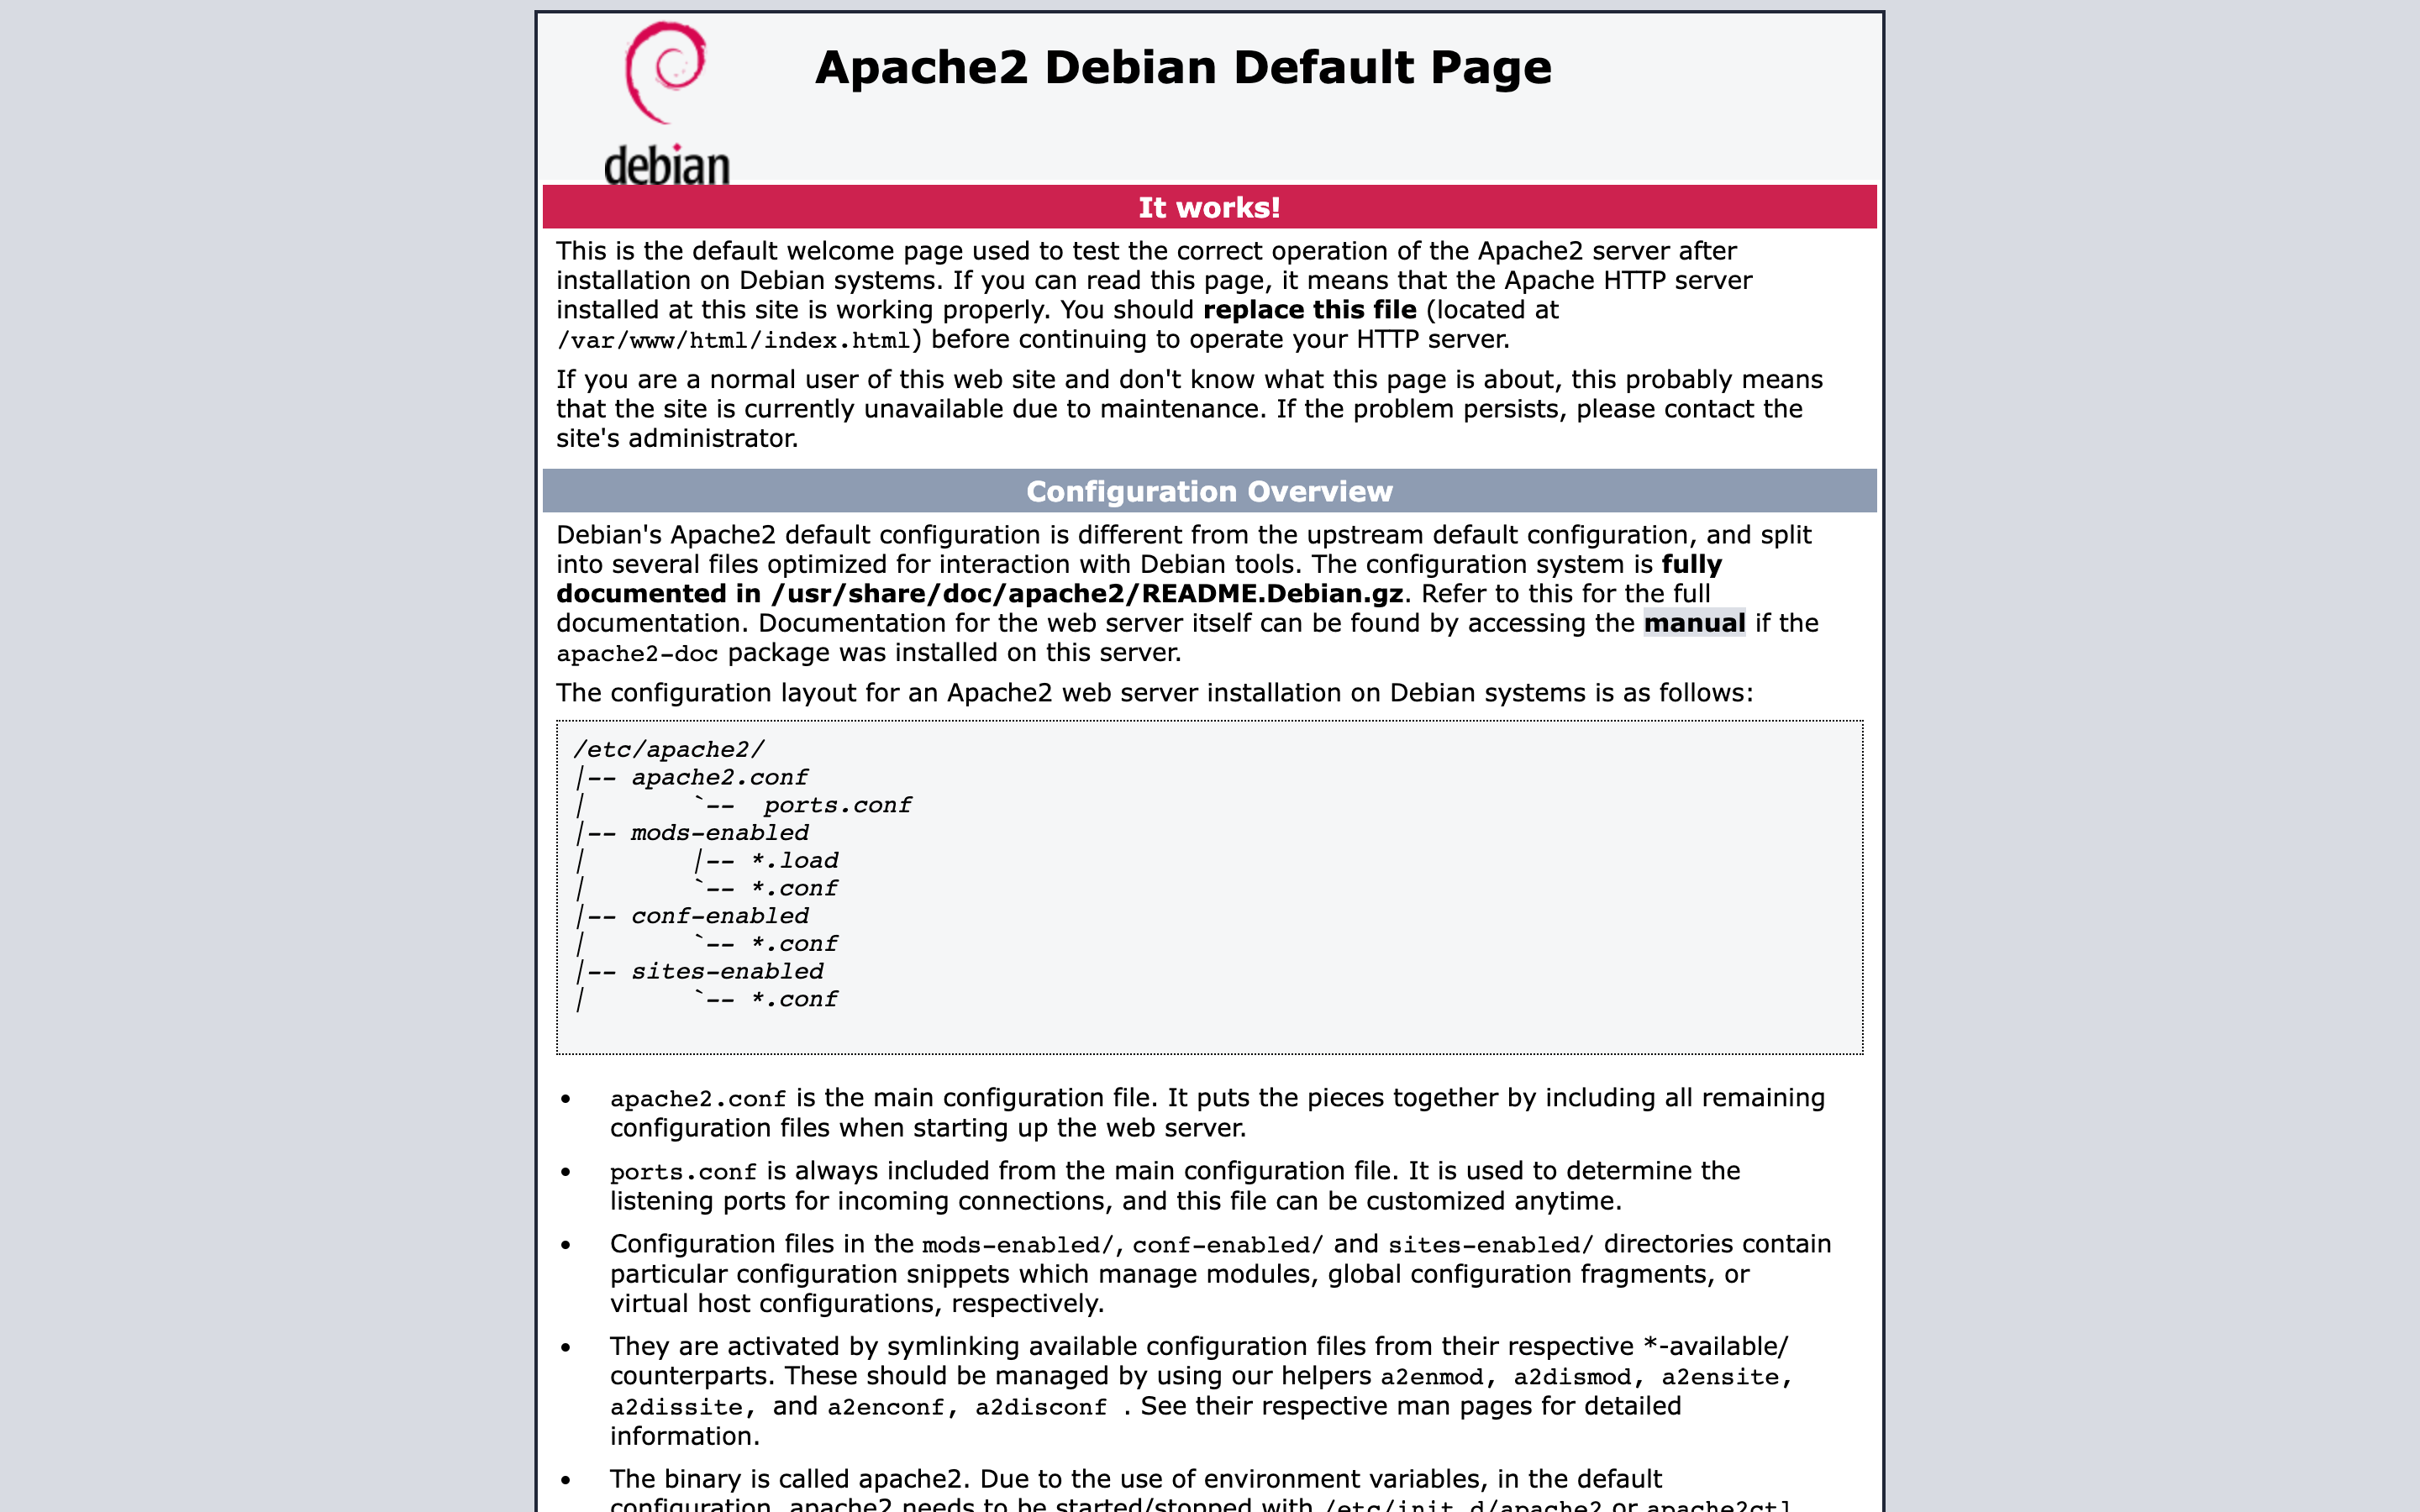
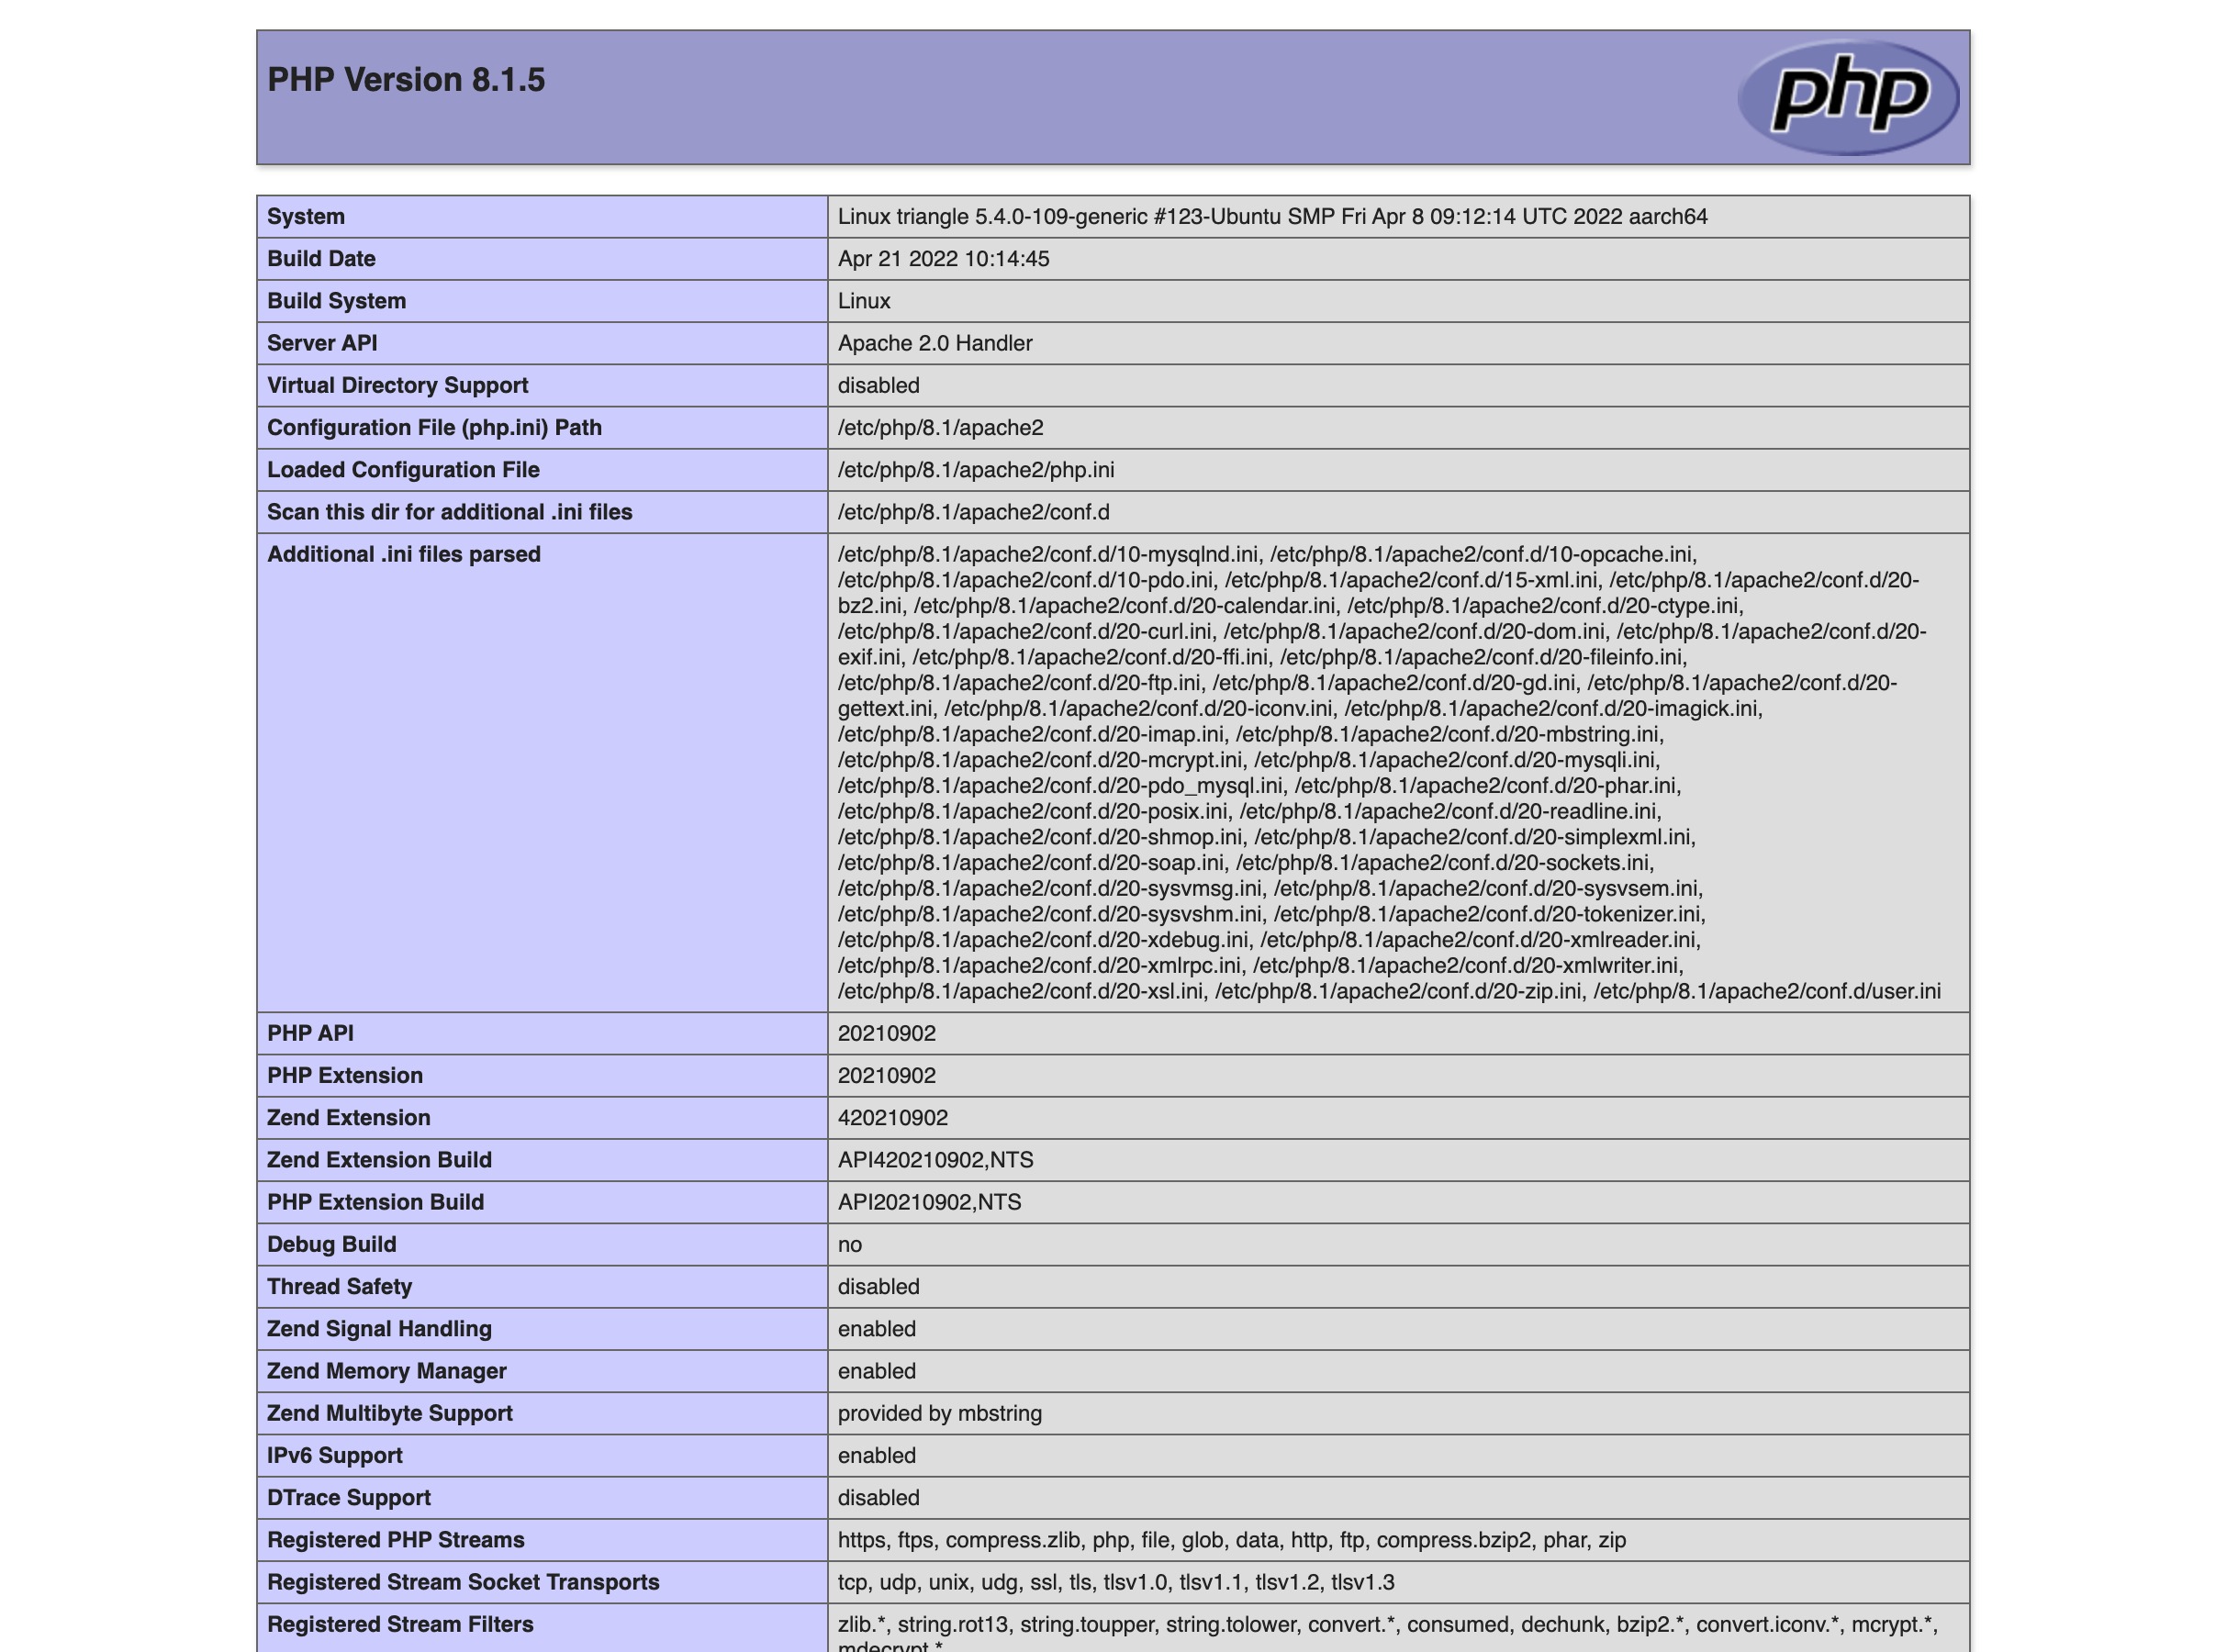
At this point, it’s a good idea to check that Apache and PHP are working correctly on the server. Browse to either the IP address or the name set up in the /etc/hosts file, for the instance and you should see this.
Then, create a PHP info.php file in the default Apache webroot.
sudo nano /var/www/html/info.php
Add the following code, and save the file.
<?php phpinfo();
If you append /info.php to the end of the IP address or instance name in the browser, you should see the PHP info page.
Step 3: Configure Apache
I need to make sure any site directories and files I create are owned and therefore executable by the same user, by editing the Apache envvars file:
sudo nano /etc/apache2/envvars
I’ll change APACHE_RUN_USER and APACHE_RUN_GROUP variables to ubuntu.
export APACHE_RUN_USER=ubuntu
export APACHE_RUN_GROUP=ubuntu
Next, I need to make sure Apache will run any index.php files in my web directories.
sudo nano /etc/apache2/mods-enabled/dir.conf
Add index.php to the list of directory files.
<IfModule mod_dir.c>
        DirectoryIndex index.php index.html index.cgi index.pl index.xhtml index.htm
</IfModule>
Save this file.
Finally, I’ll enable the Apache ssl and rewrite modules.
sudo a2enmod ssl
sudo a2enmod rewrite
And restart the Apache server to affect all the changes.
sudo service apache2 restart
Step 4: Enable the MySQL root user password
Since 8.0, MySQL defaults to using the auth_socket authentication method, and I would prefer to use the native_password method. This can be done doing the following steps:
Stop the MySQL server.
sudo service mysql stop
Edit the mysqld.conf file.
sudo nano /etc/mysql/mysql.conf.d/mysqld.cnf
Change the default authentication method.
default_authentication_plugin=mysql_native_password
Save the file, exit, and restart the server, then log in using the socket authentication method.
sudo service mysql start
sudo mysql
Run this query to set a password for the root user. In this case I’m just setting it to password.
ALTER USER 'root'@'localhost' IDENTIFIED WITH mysql_native_password BY 'password';
FLUSH PRIVILEGES;
Exit, and restart the MySQL server.
sudo service mysql restart
Test that you can log in using the root user and password.
mysql -uroot -ppassword
Step 5: Install PHPMyAdmin
sudo apt install phpmyadmin -y
The current version of PHPMyadmin that ships with Ubuntu is a bit out of date, so I like to update it to the latest version. First, I need to install the zip utility.
sudo apt install zip -y
Then, in a browser, navigate to the phpMyAdmin releases page and get the link for the latest release zip. I can download it on the Ubuntu instance using wget:
wget https://www.phpmyadmin.net/downloads/phpMyAdmin-latest-all-languages.zip
Then, unzip the archive, and move the extracted directory over the installed version. I like to keep a backup of the installed version, just in case, but you can remove it if needed.
unzip phpMyAdmin-latest-all-languages.zip
sudo mv /usr/share/phpmyadmin/ /usr/share/_phpmyadmin/
sudo mv ~/phpMyAdmin-*-all-languages/ /usr/share/phpmyadmin/
You can access PHPMyAdmin by browsing to the instance IP or name and /phpmyadmin appended to the URL.
Step 6: Install and configure MailHog
The installation steps are covered in the guide to installing Mailhog on Ubuntu 16.04 LTS. First, install and configure Go.
sudo apt-get install golang-go -y
mkdir gocode
echo "export GOPATH=$HOME/gocode" >> ~/.profile
source ~/.profile
Next, use Go to download Mailhog and mhsendmail, and copy the executables to the relevant place on the instance.
go get github.com/mailhog/MailHog
go get github.com/mailhog/mhsendmail

sudo cp /home/ubuntu/gocode/bin/MailHog /usr/local/bin/mailhog
sudo cp /home/ubuntu/gocode/bin/mhsendmail /usr/local/bin/mhsendmail
When you need to set the sendmail_path PHP variable, you can specify it in the custom PHP ini file I mentioned earlier.
sendmail_path = /usr/local/bin/mhsendmail
Because we’re running Mailhog in the Multipass instance, the one difference from the install instructions is when configuring the mailhog.service file, which you create with this command.
sudo nano /etc/systemd/system/mailhog.service
Configure the -api-bind-address and -ui-bind-address to match the virtual IP address of the instance. That way you can access the API and user interface in the browser, by browsing to either the IP address at port 8025 or the name set in the /etc/hosts file on the Mac.
[Unit]
Description=MailHog service

[Service]
ExecStart=/usr/local/bin/mailhog \
  -api-bind-addr 192.168.64.2:8025 \
  -ui-bind-addr 192.168.64.2:8025 \
  -smtp-bind-addr 127.0.0.1:1025

[Install]
WantedBy=multi-user.target
Start the service, then browse to port 8025 to see the MailHog UI.
sudo service mailhog start

Finally, enable the service, so MailHog starts whenever the instance is rebooted.
sudo systemctl enable mailhogConfigure site provisioning scripts
On Ubuntu, I had two custom scripts that would create a new site (new websites directory, set up the mkcert SSL certificates, create the MySQL database, create the relevant Apache virtual hosts, and restart the Apache server) as well as delete the site (deleting the directory, database, certificates, and virtual host files). Because I need to perform some parts of this on the Mac, and some on the Ubuntu instance, I’ve created a different repository that has separate scripts for each step of the process on each of the operating systems.
Step 1: Mount shared directories
First I need to create and mount some directories. This will vary depending on your requirements.
I like to keep all my site directories in the following location in the home directory of my laptop/workstation:
~/development/websites
I also create a directory in my home directory to store all the mkcert SSL certificates.
~/ssl-certs
So what I need to do is replicate that same structure on the Mac, but then mount those directories on the Multipass instance. This is done using the mount command. In this case, I’ll simply mount them in the ubuntu user’s home directory on the instance.
mkdir ~/development/websites
multipass mount ~/development/websites triangle:/home/ubuntu/sites
mkdir ~/ssl-certs
multipass mount ~/ssl-certs triangle:/home/ubuntu/ssl-certs
Once that is done, I need to install the relevant scripts. First, clone the repo to somewhere on your Mac.
The macos scripts are installed on the Mac system. Edit each file and change the VM_IP, VM_NAME and HOME_USER variables to match yours. If you plan to use the same directory structure as me, that’s all you have to change. If not, then you also need to change the SSL_CERTS_DIRECTORY and SITES_DIRECTORY variables to match yours.
Set both files to be executable:
cd /path/to/multipass-macos/macos
sudo chmod +x sitesetup.sh
sudo chmod +x sitedrop.sh
Then copy both to your /usr/local/bin directory. For some reason, my current MacOS configuration didn’t have a /usr/local/bin directory, so I just created it.
sudo cp sitesetup.sh /usr/local/bin/sitesetup
sudo cp sitedrop.sh /usr/local/bin/sitedrop
Next, you need to set up the multipass scripts. Switch back to the instance shell, and clone the repo there. If you’re using the same directory structure on the instance as I am, you don’t have to edit anything. Otherwise, you’ll need to edit the SSL_CERTS_DIRECTORY and SITES_DIRECTORY variables again. As with the macos scripts, set both scripts to be executable, and copy them to /usr/local/bin on the Multipass instance.
Usage
To create a new site you can run the following command on the Mac:
sudo sitesetup newsite
This will:
- create a new sites directory
newsite, as well as a database with the same name - create the SSL certificates, and the Apache virtual hosts, and enable them on the instance
- create a record for the
newsite.testdomain in the Mac/etc/hostsfile pointing to the IP address
To delete a site run:
sudo sitedrop newsite
Which will revert the sitesetup changes.
Caveats
Update 2020-06-06. It looks like this issue has been fixed with the 1.9.1 release of Multipass, so I plan to test this out in the coming weeks.
I’ve been developing with this setup for about 3 weeks now, and I’ve only encountered one unexpected problem. Whenever the Multipass instance is rebooted (either by rebooting it manually or if my laptop is rebooted) the Apache2 and Mailhog services fail. As Multipass developer Chris Townsend points out in this Github issue comment I opened, this is because:
So in Multipass controlled mounts, it is done late in process, ie, after the instance is booted and
multipassddeems the instance is in a good state. This won’t play nice with services that start on boot that rely on the mount to be there already.
This is not a huge problem, but it does mean from time to time I need to switch to the instance shell and restart the two services.
sudo service apache2 restart
sudo service mailhog restart
What’s not great about this is that it derails my attempts to automate the installation of this instance, until I can figure out a way around this blocker. For now, though, I have a working local development environment using Multipass.
Bonus: Debugging with Xdebug
Because I use PHPStorm I like to use the Zero Configuration Debugging with Xdebug functionality. In order to do this, I need to install and configure Xdebug on the Multipass instance.
First I switch back to the Multipass shell:
multipass shell triangle
Then install Xdebug:
sudo apt-get install php-xdebugFinally, enable Xdebug in the PHP configuration file mentioned earlier. Configure the client_host IP address and set it to the IP address of the MacBook on the virtual network.
zend_extension=xdebug.so
xdebug.client_host=192.168.64.1
xdebug.mode=debug
To make sure it’s working, validate the Xdebug configuration in PhpStorm by opening the Preferences and navigating to PHP -> Debug, and clicking the Validate link.

Enter the local path to the website, and the URL of the server, in my case pointing to the .test domain, and click the Validate button.
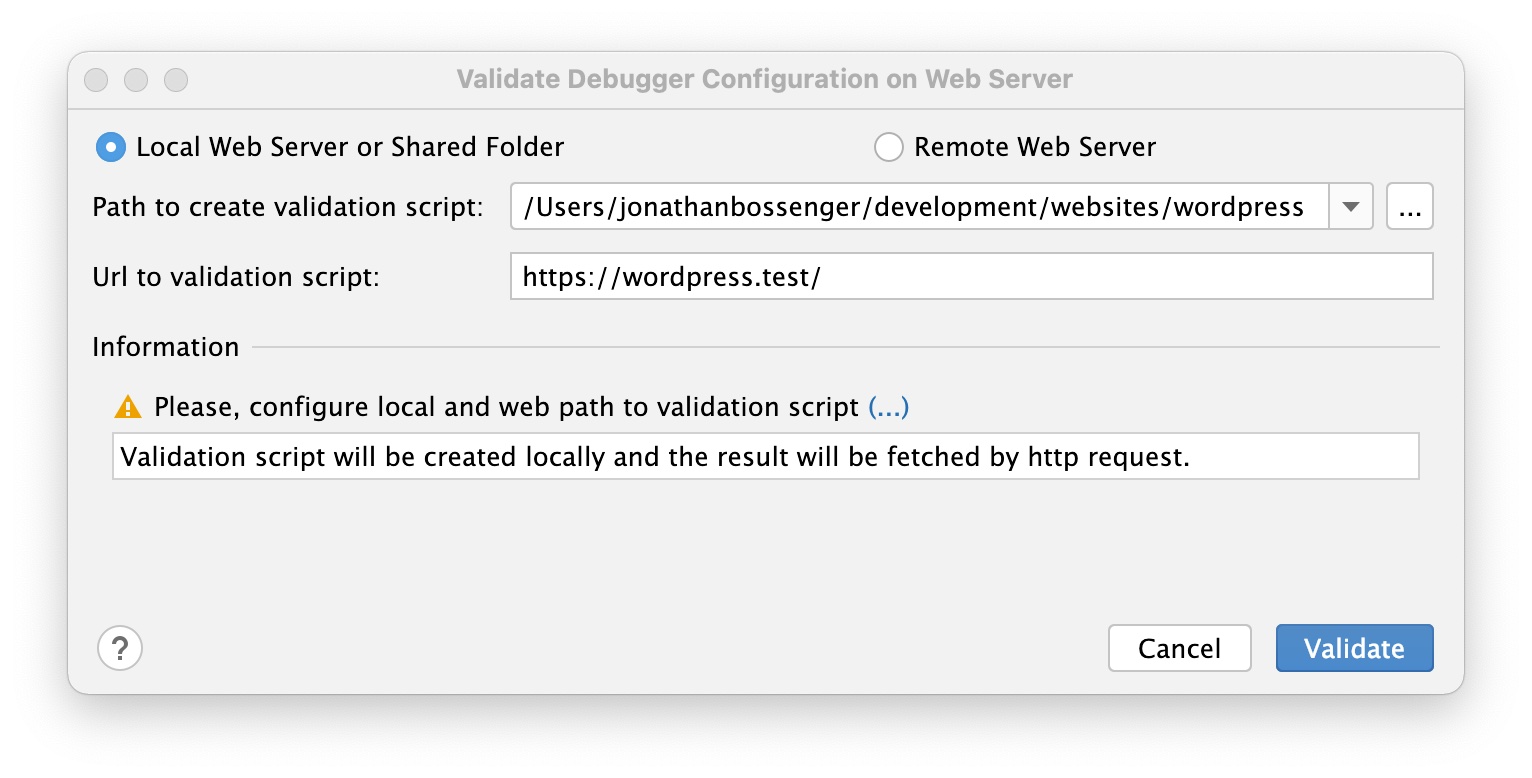
If it’s all set up correctly, PhpStorm will confirm this.

Bonus 2: Configuring Xdebug in VS Code
Since I present my workshops using VS Code, I wanted to figure out how to debug using VS Code.
Step one is to install the PHP Debug extension for VS Code:
https://marketplace.visualstudio.com/items?itemName=xdebug.php-debug
Then, open a folder where you have your web projects’ PHP Code.
Once that’s installed, click on the “Run and Debug” sidebar item, and click “create a launch.json file”. If it asks which language, select “PHP”.
At the time of this writing this will generate a file with the following JSON object:
{
    // Use IntelliSense to learn about possible attributes.
    // Hover to view descriptions of existing attributes.
    // For more information, visit: https://go.microsoft.com/fwlink/?linkid=830387
    "version": "0.2.0",
    "configurations": [

        {
            "name": "Listen for Xdebug",
            "type": "php",
            "request": "launch",
            "port": 9003
        },
        {
            "name": "Launch currently open script",
            "type": "php",
            "request": "launch",
            "program": "${file}",
            "cwd": "${fileDirname}",
            "port": 0,
            "runtimeArgs": [
                "-dxdebug.start_with_request=yes"
            ],
            "env": {
                "XDEBUG_MODE": "debug,develop",
                "XDEBUG_CONFIG": "client_port=${port}"
            }
        },
        {
            "name": "Launch Built-in web server",
            "type": "php",
            "request": "launch",
            "runtimeArgs": [
                "-dxdebug.mode=debug",
                "-dxdebug.start_with_request=yes",
                "-S",
                "localhost:0"
            ],
            "program": "",
            "cwd": "${workspaceRoot}",
            "port": 9003,
            "serverReadyAction": {
                "pattern": "Development Server \\(http://localhost:([0-9]+)\\) started",
                "uriFormat": "http://localhost:%s",
                "action": "openExternally"
            }
        }
    ]
}
You can either edit the first configuration to match your Multipass instance settings or add a new one. I opted to add a new one.
Either way make sure to edit the pathMappings directory to the location of your code directory on the multipass instance, not your local machine.
If you followed this tutorial, it’s going to be something like this:
/home/ubuntu/sites/sitenameAlso, make sure to use the correct port number. You can use the xdebug_info() function in the same way that you use the phpinfo() function to check which port is being used.
Your new configuration would look like this:
        {
            "name": "Listen for Xdebug on wp-local-env",
            "type": "php",
            "request": "launch",
            "port": 9003,
            "pathMappings": {
                "/home/ubuntu/wp-local-env/sites/xdebugpress": "${workspaceFolder}"
            }
        },
Then, at the top of the Run and Debug sidebar, select your chosen configuration from the drop-down and click the Play button. Place a breakpoint in your code, and refresh your browser. You’ll need to be using the same browser extension you would have installed from the PhpStorm Zero Configuration Debugging with Xdebug setup.
Bonus 3: wp-local-env
I like using Multipass for local development so much, I created a local development environment out of it. Inspired by Scotch Box, wp-local-env aims to be a cross OS (macOS, Windows, Linux) local development environment for WordPress (or any other PHP, MySQL web application). I’m still working on full Windows support, but it works out of the box on MacOS and Linux at the moment.
Leave a Reply